Showing posts with label Expression. Show all posts

Thursday, July 1, 2010

Expression Blend 4: Improvements to Photoshop file import

In Expression Blend 4 some layer effects (Drop Shadow, Inner Shadow, Color Overlay, Outer Glow, Inner Glow, Gradient Overlay, Bevel & Emboss, Satin) can now be merged with their layers.

If a layer effect has been applied to a layer, the Layer effect icon appears next to the layer in the Import Adobe Photoshop File dialog box. A layer effect can be imported either by selecting the Flattened bitmap import option or by merging the layer with other layers.

01_PhotoshopImport_01 01_PhotoshopImport_02

Adam Kinney wrote a great post about importing art from Photoshop and making into Silverlight controls. You should read it!

Sunday, June 20, 2010

Expression Blend 4: Fluid UI - Enhanced FluidMoveBehavior & Layout States

In Blend 4, Fluid Layout has many new tricks. You can now define layout animations between a master list and a detail view and animate things that move between lists. You can also animate the process of items being added to and removed from a ListBox.

An exciting enhancement has been made to the FluidMoveBehavior.

FluidMoveBehaviorMasterDetail
01_FluidMoveBehavior_MasterDetails_01 01_FluidMoveBehavior_MasterDetails_0201_FluidMoveBehavior_MasterDetails_03 - Mod

By using FluidMoveBehavior together with FluidMoveSetTagBehavior, you can animate a transition from a specified starting point, even if that initial location is specified only by a reference to the data that is displayed in your application and may exist in a different scope. Data tagged by FluidMoveSetTagBehavior is available for use with FluidMoveBehavior by using a hidden data store.

FluidMoveBehavior is optimized for two main scenarios: animating from a master list to a detail view and animating list items from one list to another.

FluidMoveBehaviorListToList
02_FluidMoveBehavior_ListToList_0102_FluidMoveBehavior_ListToList_03

In Silverlight 4, a special VisualStateGroup called LayoutStates has been added specifically for animating adding items to and removing items from a ListBox (or custom ItemsControl). You may have a look at my previous post (updated sample you can get from here).

If you also apply a FluidMoveBehavior behavior to the items panel of the ListBox, existing items will smoothly make room for entering new items.

02_FluidMoveBehavior_ListToList_02

Useful links

Tuesday, September 22, 2009

Expression Blend 3: Out-of-Browser Applications & Application Library Caching

Expression Blend 3 supports out-of-browser applications and application library caching. In July I wrote about these Silverlight 3 features here and here. In this post I’ll show how easy is to use them in new Blend.

Out-of-Browser Applications

You can configure a Silverlight application to run outside the browser, by using the Silverlight Project Options –> Enable Application Outside Browser on the Project menu.

OutOfBrowser

Below you see the dialog box that appears when you try to run project first time.

OutOfBrowser2

Application Library Caching

You can configure a Silverlight application to cache library extensions by using the Silverlight Project Options –> Use Application Library Caching on the Project menu.

LibraryCaching

Application Outside of Browser and Application Library Caching are cool but they can't be used at the same time because application library caching uses the Internet cache of the browser.

Sunday, September 20, 2009

Expression Blend 3: Effects, Projections 3D & some improvements

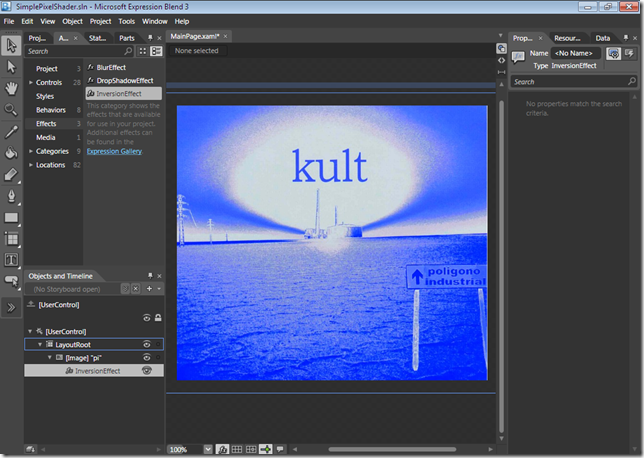
New Blend supports new Silverlight 3 features such as effects and projections. Today I’ll show it and I’ll describe some Blend improvements in animation and template support I haven’t described yet.

Effects

I have written post about effects. Below I show how to use them in Blend.

Effect1 Effect2

Projections 3D

I have written post about projections. Below I show how to define them in Blend.

Projection3D

Animation: Record Current Value

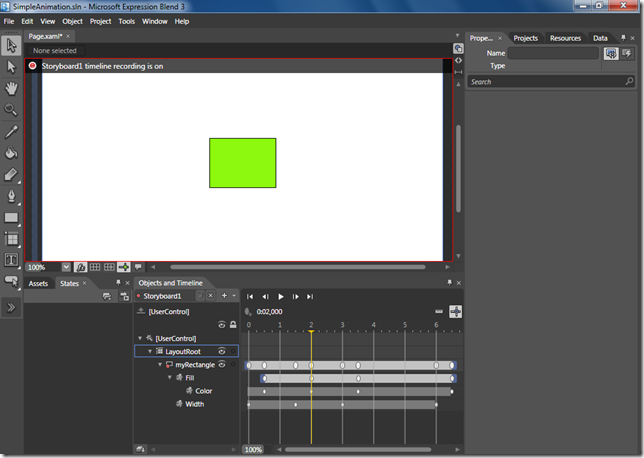
In a Silverlight project, you can record keyframes for many more properties than before. There is a new menu command, Record Current Value, on the Advanced property options menu.

AnimationCurrentValue1 AnimationCurrentValue2

Animation: Resource values

With new Blend you can animate to and from some resources, too.

Animation: Timeline improvements

Timeline improvements has been described by Expression Team. With new Blend you can draw a marquee around keyframes to select all the keyframes that fall within it.

AnimationSelectAll

You can use the new blue drag-handles on the animation bars to move the start and end times of the animation, and the times of the keyframes within it will be scaled up or down accordingly. You can also click and drag on the gray background of the animation bar to shift the whole animation in time.

AnimationBarScale1 AnimationBarScale2 AnimationBarTranslate

Easier Access to Template Internals

If a control includes templates that are applied in specific scenarios, such as when a control has to display a collection of data, those templates now appear in the Edit Other Templates menu.

OtherTemplatesBlend2OtherTemplatesBlend3

Saturday, September 19, 2009

Expression Blend 3: Support for the Silverlight Visual State Manager

In Expression Blend 3, support for the Silverlight Visual State Manager (VSM)  has been improved. In this post I’ll show five new features.

Drawing into state

When you select a state and draw a new element, the new element will be visible only in the selected state at runtime.

DrawIntoState1DrawIntoState2 DrawIntoState3

State pinning

You can pin a preview of one state in a state group while modifying another state in a different state group.

Pinning1 Pinning2

Editing transitions

You can select the storyboard for a state transition and modify it in the Objects and Timeline panel.

TransitionEdit

Previewing transitions

You can preview transitions by clicking Turn on transition preview in the States panel. When transition preview is on, each time you change your selection from one state to another, the currently-defined transition between those two states plays out on the artboard just as it will at run time.

TransitionPreview1TransitionPreview2TransitionPreview3

FluidLayout

In previous versions of Expression Blend, if you changed such properties as the Row, Column, ColumnSpan, or RowSpan of an object in different states, the change would be instantaneous, even if a transition duration was specified. By selecting Turn on FluidLayout, you can make an object move smoothly from one cell in a Grid layout panel to another.

FluidLayout1FluidLayout2FluidLayout3 FluidLayout4

There are also other improvements. You can see states for controls, regardless of whether those states were defined in your XAML file originally. The States panel displays a warning when a property has been changed in more than one state group.

Thursday, September 17, 2009

Expression Blend 3: Creating templates from artwork

With Expression Blend 3, you can use the modified Make Into Control command to select artwork on the artboard and to convert it into a control template for a control. Read this post.

Expression team has written excellent post about this feature of  new Blend.  You can also read about it in Blend User Guide.

Smart Make Into ContentControl (f.e Button)

When you use Make Into Control to turn artwork containing a TextBlock object into a template for a ContentControl (buttons and so on), Blend does the following for you:

  • Put a ContentPresenter into the template in place of the TextBlock.
  • Copy layout properties from the TextBlock to the ContentPresenter.
  • Copy Typography properties from the TextBlock (f.e Foreground) to the control Style.
  • Copy the Text property from the TextBlock to the control instance’s Content property.

Button1 Button2 Button3

Smart Make Into TextBox

When you use Make Into Control to turn artwork containing a TextBlock object into a template for a TextBox, Blend does the following for you:

  • Put a ScrollViewer representing the ContentElement part into the template in place of the TextBlock.
  • Copy layout properties from the TextBlock to the ContentElement part.
  • Copy Typography properties from the TextBlock (f.e Foreground) to the TextBox Style.
  • Copy the Text property from the TextBlock to the TextBox instance.

TextBox1 TextBox3

Controls with template parts (f.e Slider)

In a Silverlight project, Make Into Part command and Parts panel are very useful for creating templates for controls with template parts.

Slider

You can right-click objects in your template and click Make Into Part to assign objects in your control to specific roles.

Slider3Slider4

The Parts panel makes it easy to manage and create the parts (double-click) required by a control template.

Slider7Slider8    

Monday, September 14, 2009

Expression Blend 3: Gradient Tool, Tile Brush & Easing Functions

Blend 3 has new gradient tool with many improvements. Using Tile Brush in Silverlight 3 we can use images as background in a very easy way. Easing functions are very easy, too. In this post I’ll show these features of new Blend.

Gradient Tool

GradientTool_1 GradientTool_2 GradientTool_3

Tile Brush

TileBrush

Easing Functions

EasingFunction

Some useful links